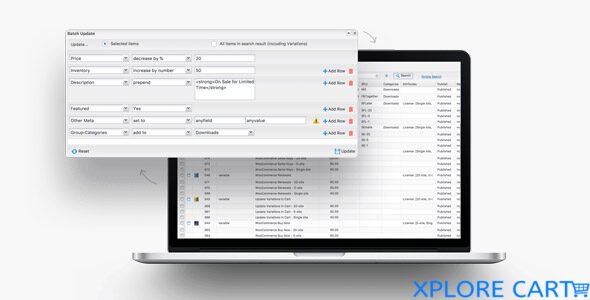
Tired of juggling multiple plugins to manage your WooCommerce store? Wish you had a single, powerful tool to optimize everything from product listings to abandoned carts?
Introducing WooCommerce Smart Manager, a free and open-source plugin that puts you in control of your store like never before. It’s the all-in-one solution you’ve been waiting for, packing a punch with features like:
- Automated product optimization: Boost conversions with AI-powered product titles, descriptions, and tags.
- Abandoned cart recovery: Say goodbye to lost sales with targeted email sequences and recovery popups.
- Dynamic pricing and discounts: Implement smart pricing rules to maximize profits and win over customers.
- Inventory management: Stay on top of stock levels and avoid overselling with automated alerts and reports.
- Order and customer management: Streamline your workflow with bulk actions, custom order statuses, and powerful customer insights.
And that’s just the tip of the iceberg! WooCommerce Smart Manager is constantly evolving, with new features and integrations being added all the time. Plus, it’s built with an open-source core, meaning you can customize it to your heart’s content.
So ditch the plugin bloat and unlock the true potential of your WooCommerce store with WooCommerce Smart Manager. It’s free, it’s powerful, and it’s the future of store management.
Tired of tedious, repetitive tasks bogging down your WooCommerce workflow? Wish you could manage everything with a few clicks?
Features of WooCommerce Smart Manager:
Enter WooCommerce Smart Manager, your one-stop shop for bulk editing, inventory mastery, and customer insights. Stop juggling plugins and unleash the full potential of your store:
Bulk Edits:
- Prices, categories, and inventory: Tweak them all in a flash, no more mind-numbing repetition.
- Variations: View, manage, and edit them seamlessly.
- Product images: Update entire categories with a single click.
- Discounts: Quickly adjust rules for multiple coupons at once.
Inventory Control:
- Never oversell: Set automated alerts and reports for stock levels.
- View variations: Manage stock for each variation with ease.
Customer Insights:
- Find orders and customers: Lightning-fast search makes it a breeze.
- See their lifetime value: Know your most valuable customers.
- Edit details: Change email addresses, manage roles, and more.
And that’s not all!
- Set and revert sale prices: Perfect for flash promotions.
- Export clean data: No more corrupted or missing entries in your CSV files.
- Add custom meta fields: Tailor your store to your unique needs.
- Manage media directly: Add and delete product gallery images effortlessly.
- SEO, reviews, subscriptions: Control them all with ease.
Open the door to endless possibilities. WooCommerce Smart Manager is open-source, so you can customize it to your heart’s content.
Stop managing, start commanding. Download WooCommerce Smart Manager today and watch your store soar!
How to Install WordPress Themes:
- Download Theme:
- Download the theme.zip file from the source to your local computer.
- Access WordPress Administration:
- Navigate to Appearance > Themes from your WordPress Administration area.
- Click on Add New.
- Upload Theme:
- On the Add New theme screen, choose the option “Upload Theme.”
- Click “Choose File,” select the theme zip file on your computer, and hit “Install Now.”
- Activate Theme:
- After successful installation, log in to your control panel.
- Go to Appearance > Themes, hover over the new theme, and click “Activate.”
- Explore Your New Theme:
- Check out your website with the new theme and explore the design changes.
How to Install WordPress Themes using FTP:
- Launch FTP Client:
- Open Filezilla, enter your login details, and click Quickconnect.
- Navigate to Theme Directory:
- In the Remote Site window, go to /rootdirectory/web/content/wp-content/themes.
- In the Local Site window, select the folder containing your saved theme and upload it.
- Activate Theme:
- Log in to your control panel, go to Appearance > Themes.
- Hover over the new theme and click “Activate.”
How to Install WordPress Plugin Manually:
- Install via Dashboard:
- In your WordPress dashboard, go to Plugins > Add New.
- Click “Choose File,” locate the plugin .zip file, and click “Install Now.”
- After installation, click “Activate Plugin.”
- Install via FTP:
- Download the desired plugin as a .zip file.
- Extract the plugin file, revealing a folder with the same name.
- Connect to your WordPress website’s server using an FTP client.
- In the wp-content folder, open the plugins folder.
- Upload the unzipped plugin folder.
- Return to your WordPress dashboard, go to Plugins > Installed Plugins, and click “Activate” for the new plugin.


